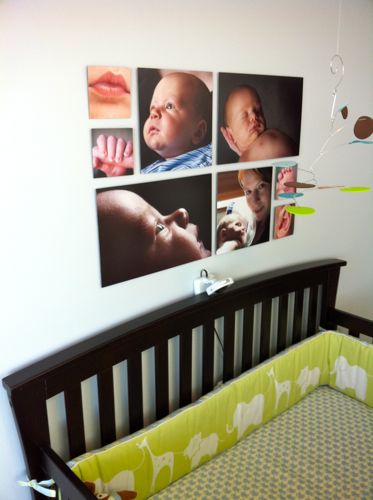
Collagewall is an all-in-one printing service that allows you to easily configure and order photo collage prints to hang on your wall. A friend, Josh Norem, tipped me off to the existence of Collagewall.com not that long ago and I was instantly intrigued by the possibilities. After a quick review of the site and their demo videos I knew I had to try it.
First and foremost I have to say Collagewall is the best print service and product I’ve used all year. The online configuration and ordering system is amazingly simple and the unique peg and paper socket mounting system makes installation simple.
How Does It Work?
After creating an account on Collagewall.com and logging in you can create photo collage project from nearly 200 layout templates or create your own. Next you upload your photos and assign them to an image location in the template. The online system allows you to zoom in/out of and pan with in your photos. Once your design template is populated with images you finalize your order and with in days your images and an installation kit arrives at your door.

Installation
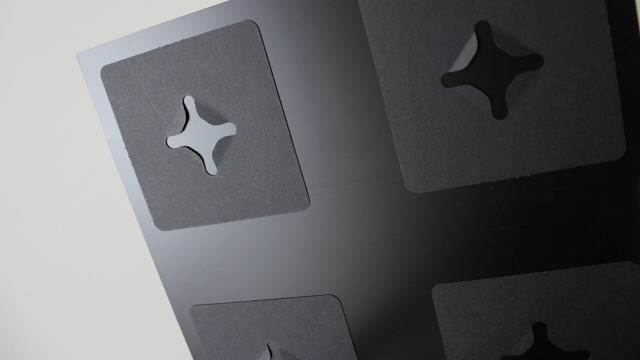
Collagewall utilizes a foolproof means of installation. A paper template is provided that assists you in placing each mounting peg in exact location for a symmetrical and evenly spread display of your photos. The back of each photo then has a grid of paper sockets that attaches to each peg. There really isn’t a way you can mess up an installation and it removes any need to measure or calculate placement of your images. In my case I have plaster walls so I had to utilize a drill bit (that was provided) to prime the wall before I hammered in my pegs. I was warned about this during the configuration process online, but in my infinite wisdom ignored that warning when I tried my first install. I quickly found out that the pegs bend when hammered into an unprimed plaster wall. Lesson learned heed the warnings provided.
Ultimately the installation of my photo collage took 20 minutes. I was originally going to surprise my wife with a canvas wrap triptych of our son’s baby photos, but ditched the idea when I found out about Collagewall. While she was out on an errand I quickly installed the photos and had time to spare while I awaited her return.
Print Quality
As easy as the configuration and installation was the bottom line as to whether I would ever use Collagewall again depended on the print quality. Having looked at ink jet prints until I’m blue in the face I was extremely pleased with the silver-halide prints that were part of the delivered package. Each photo is printed at a high-resolution of 320 dpi on Fuji Archival Paper and they look incredibly sharp. I expected the photos from my Canon 1Ds Mark III to look great, but I was blown away that even my iPhone 4 photos came out looking incredible. In the end print quality exceeded expectation.
Final Thoughts
As you’d imagine I am really happy with my Collagewall experience and I would certainly recommend using the service. Unfortunately its available only to those in the United States at the moment. My experience wasn’t perfect as the drill bits provided did not hold up well and broke easily. All-in-all that hardly impacted my experience negatively and I later learned that additional drill bits can be requested for free. Price seemed a little high when I placed my order, but after seeing the quality of the material and prints I think you get what you pay for. That being said I do hope the pricing comes down as I’d still like to get more bang for my buck. Ultimately I’d love to be able to present large prints in this fashion and not just be confined to photo collages.
In the even you missed my earlier giveaway of a $200 gift certificate to Collagewall be sure to take advantage of the 15% discount that is good for my blog readers through January 15th.
After the jump you can see the photos of the installation…
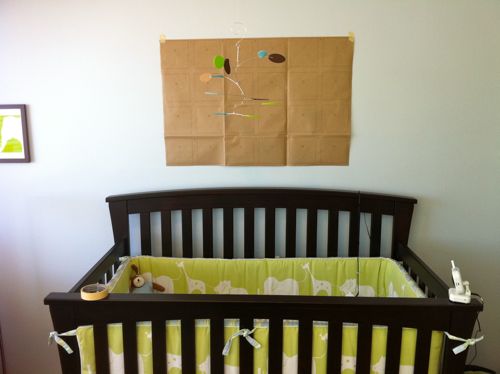
Collagewall Paper Template
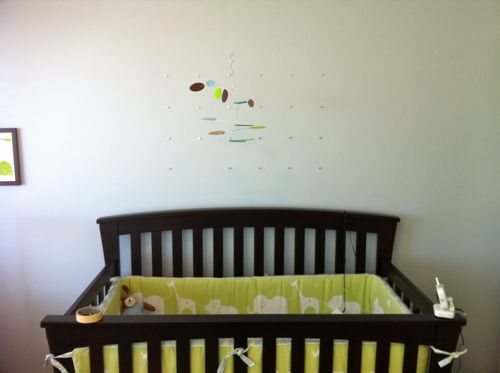
Collagewall Wall Pegs Installed
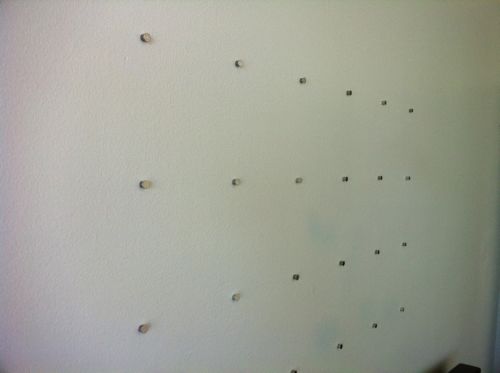
Collagewall Wall Pegs Installed Closeup
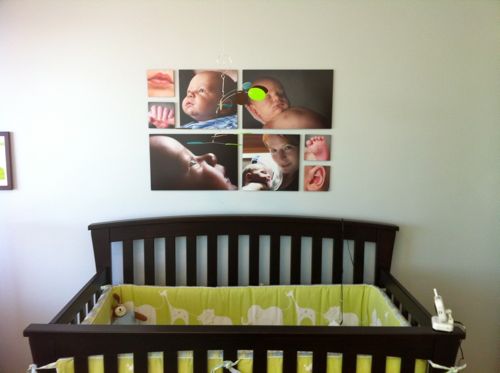
Collagewall Final Install I
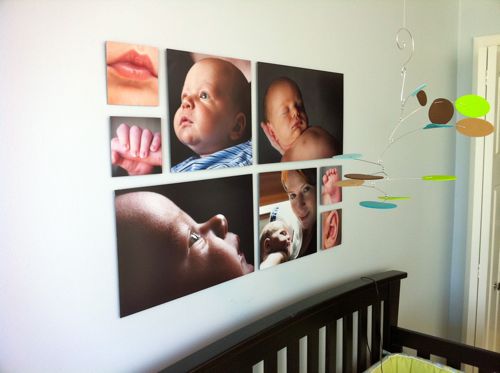
Collagewall Final Install II
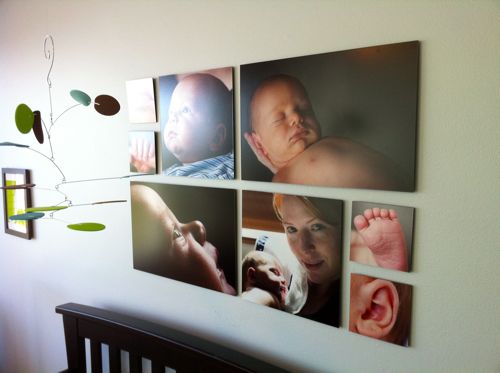
Collagewall Final Install III

That looks amazing! Thanks so much for your review–I’ve never heard of them, but I am going to give them a try! I’ve been wanting to do something like that for my bedroom, but was intimidated re: measuring. Now I will proceed with confidence!
Once you put the tacks in, do you take them all down to remove the paper and then put them back in? How strong is the dock on the back of the prints that fit into the tacks? Thanks – this looks neat!
You just tap in the tacks to mark the wall. After removing the paper you then look for the marks and place the tacks. The back mounting is plenty strong as it easily supports the photo. Each photo is held in place by multiple tacks as well.
Thanks. I was wondering about the back mounting in case one reconfigures periodically – that is not plastic or metal, so can’t the paper wear out? Thanks!